
UFO and its wide range of gorgeous vehicles have been an inspiration to LEGO® enthusiasts for many years. In particular, there are some very detailed and impressive brick-built models of the Moonbase Interceptor and the SHADO Mobiles out there which I simply drool over because of how big and complex they are. These builds are normally produced at minifigure scale or thereabouts. But instead of following the same path as the dedicated LEGO® and UFO fans that came before me, I decided that working on the vehicles in microscale would be the best approach to bring the SHADO fleet to life on my shelves.
There are three big advantages to working on little microscale MOCs like this:
- They are much cheaper to build.
- Some fun design challenges come into play when a whole section of a vehicle needs to be condensed down into just one or two small LEGO® parts, leading to some creative parts usage.
- They don’t take up a lot of valuable shelf space.
So which vehicles from the Andersons’ first live-action series did I decide to build? Well, it all started with my favourite craft from UFO – a certain submarine/aircraft combo which I’ve had my eye on for a long while now…
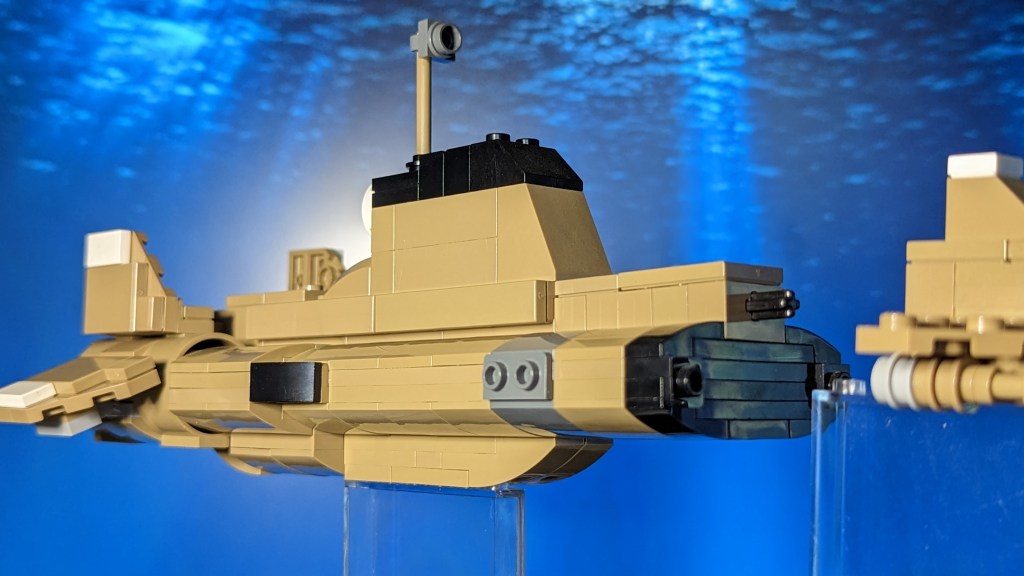
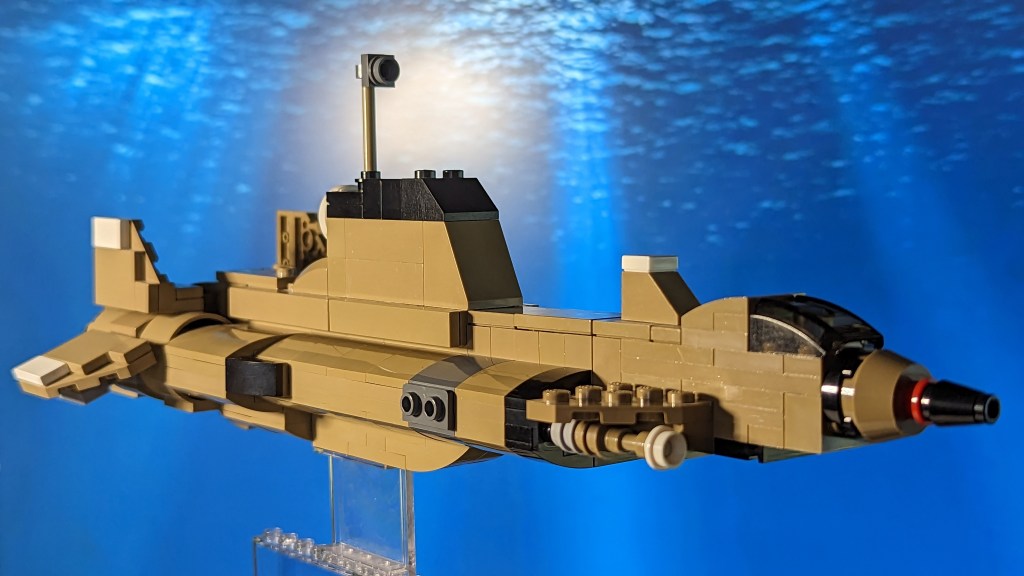
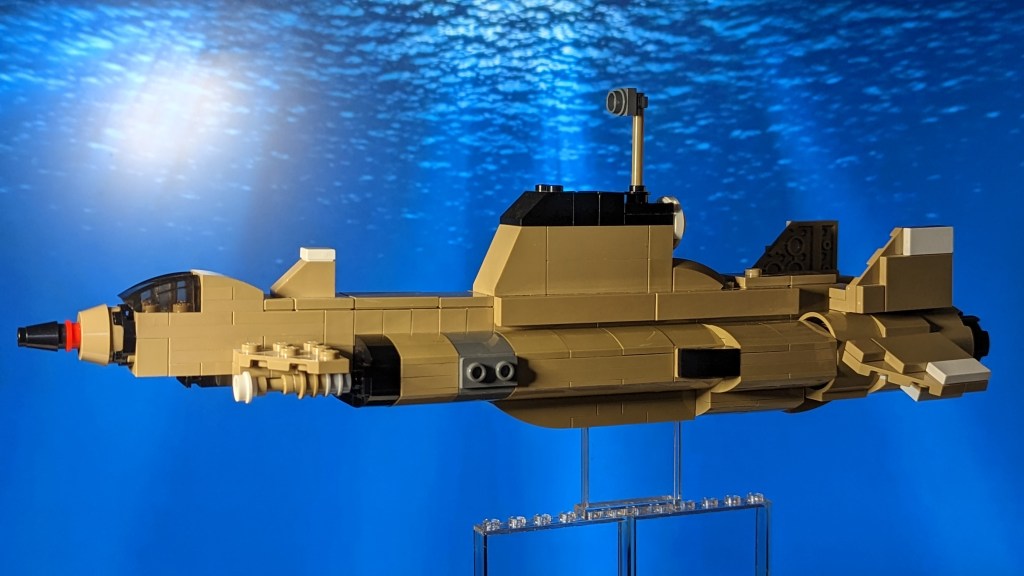
Skydiver (+ detachable Sky 1)
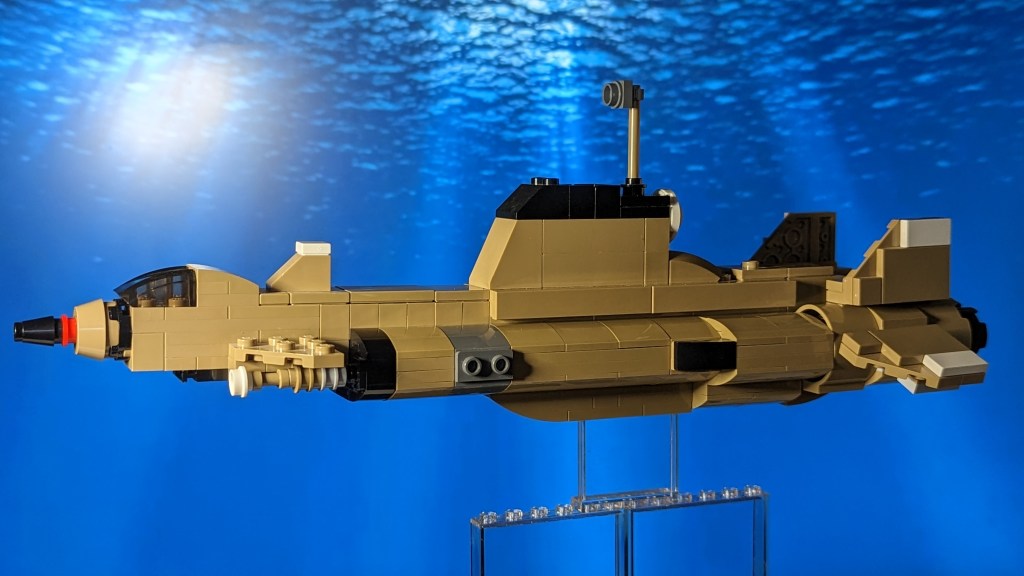


There’s a lot about SHADO’s underwater vessel, Skydiver, that doens’t lend itself easily to LEGO®. The not-quite-green, not-quite-gold, not-quite-bronze hue that gets distorted by the fact the craft is usually shown underwater made picking an accurate LEGO® colour to work with rather tricky. In the end, I settled on dark tan. It seemed to be the colour that would most closely match the original model while offering up a wide enough selection of parts produced by LEGO® to make the build possible.
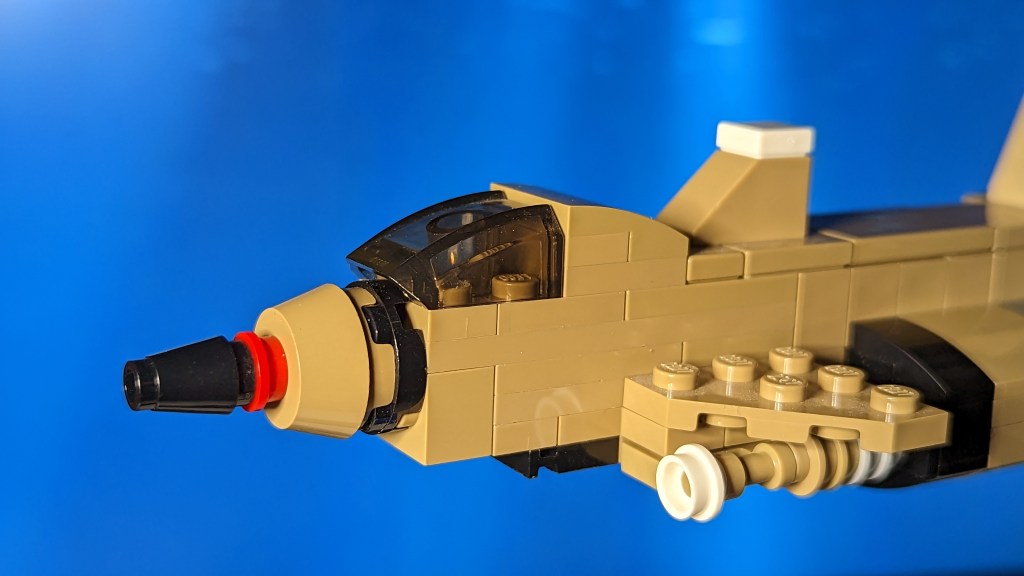
The next challenge was figuring out the ideal size of the finished model. I usually start this part of the design process by figuring out the piece or pieces I want to use for a vehicle’s windscreen or cockpit, since that area is usually a very specific shape and is directly comparable in size to the pilot who sits inside. For Sky 1’s cockpit, I eventually settled on using the unusual LEGO® 30602 – Slope, Curved 2 x 2 Lip in trans-black. After that, the rest of the process was simply working away in BrickLink’s Studio program until I had a cute little model of Sky 1 designed.

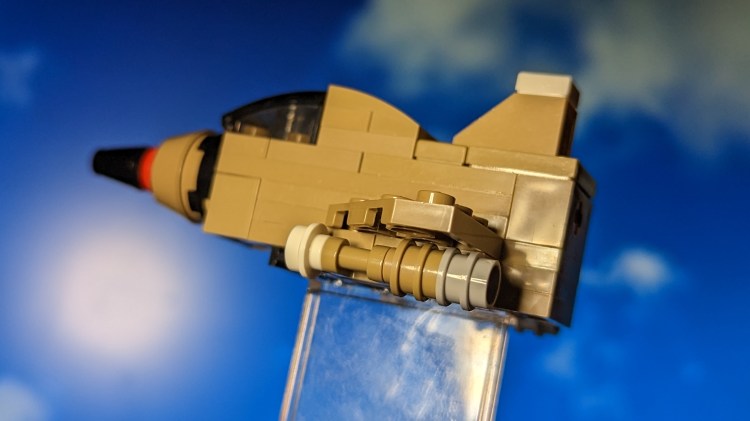
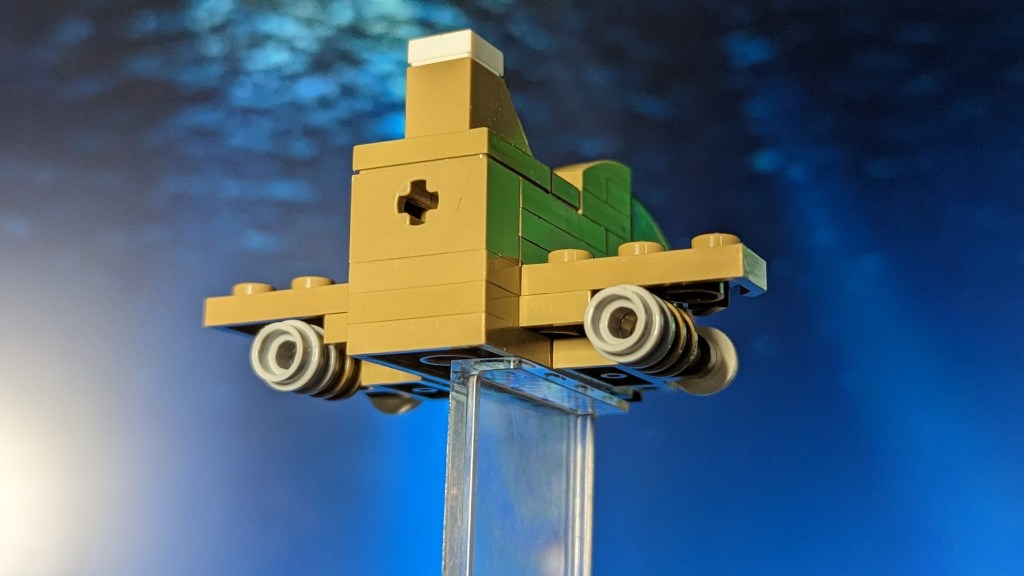
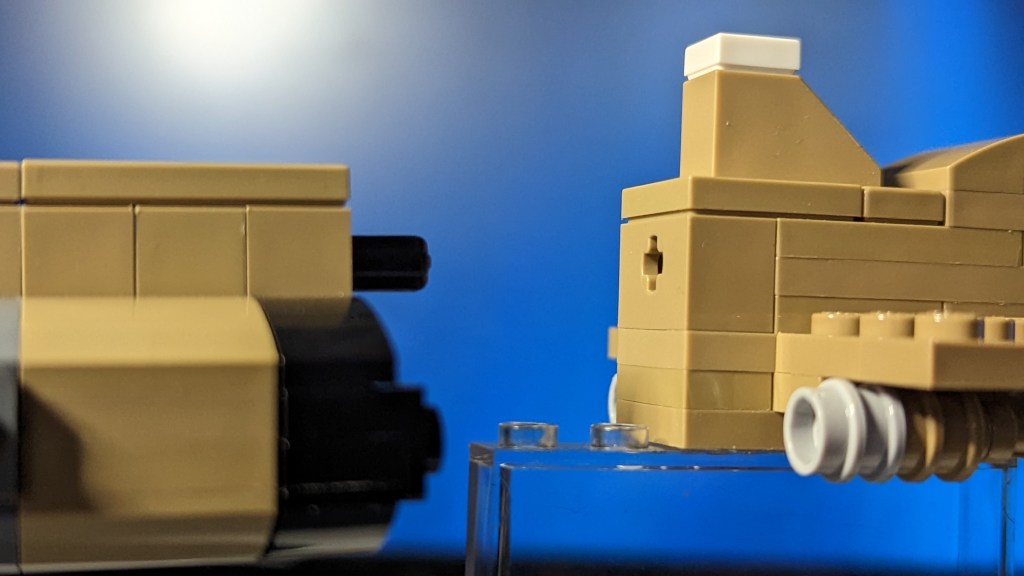
Of course, I wanted Sky 1 to detach from the main Skydiver body and there were several approaches I could have taken to achieve this. In order to retain maximum strength and the best possible connection between the two parts, I decided to run a technic axle through the main body which could simply plug into the back of Sky 1 and allow for easy detachment and reattachment. I had learned during the construction of my Zero-X MOC that sometimes technic pins can grip a little too hard and make for a tricky disassembly process. Sitting on the end of the axle, Sky 1 can blast off with the smallest of tugs while remaining firmly in place when under the ocean.
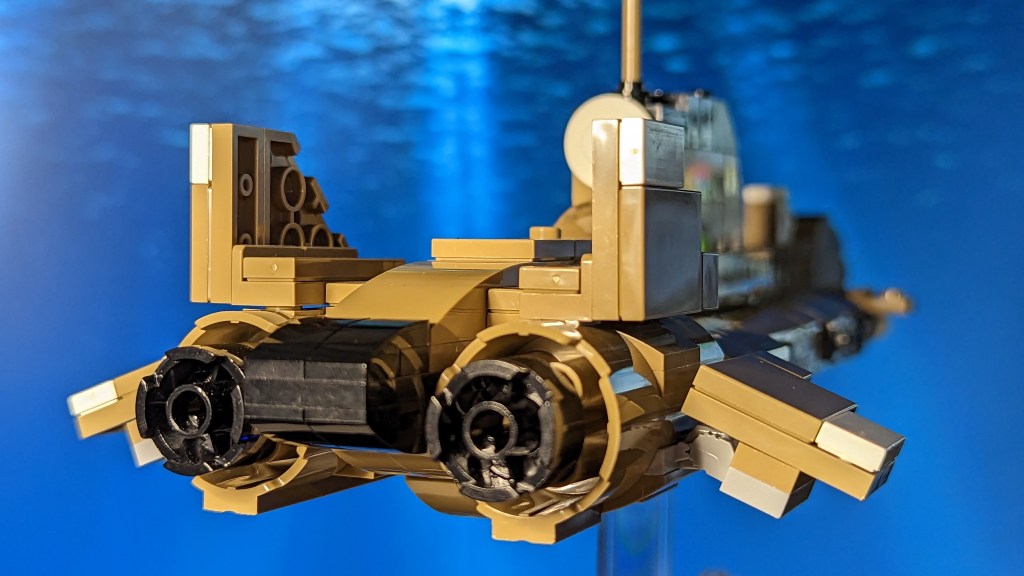
The rest of the build for Skydiver’s main body was an enormous case of trial and error with various SNOT techniques and curved slopes to achieve the rounded and complex shape of the craft. Attaching fins and thrusters at the rear of the model was also a challenge because of the fine line between making various angled connections strong enough without also making them too bulky and unsightly. With a few compromises here and there, I eventually had a MOC designed which was structurally sound.
Before I ordered the pieces and started building, I went through one more critical step which I advise all MOC builders who design digitally to start using if they want to save money on their builds. Open up the ‘handy ‘Model Info’ window on your build and take a look at the parts list. You may find that the estimated cost of certain pieces is eye-watering. The scarcity of certain LEGO® parts in certain colours drives their prices up so if you’re working with a limited budget, now is the time to go through the whole build piece by piece and determine what is a must-have, and what could be substituted for a more affordable piece. I’ve reduced the final cost of some of my builds by as much as 50% just by going through this re-drafting process, and usually without compromising on external appearances. Most of the adjustments are made to the internal structure of the builds which nobody will ever see, and can often be made much more affordable just by swapping colours or reducing the number of parts needed to achieve the same goal. In fact, this will often lead to techniques which actually strengthen the internal structure. In the same way you wouldn’t publish the first draft of a novel, don’t settle for building the first draft of your LEGO® designs!
Space Intruder Detector (S.I.D.)
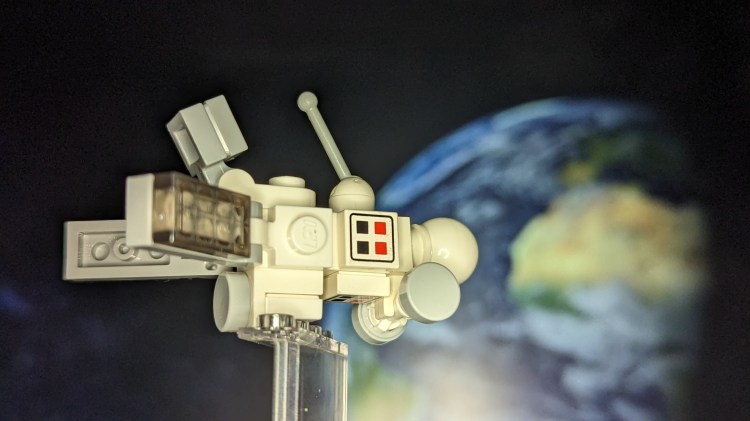
Having determined that I wanted to build as many of the regularly-seen vehicles from the SHADO fleet as possible, I decided to tackle the next-most awkward of the bunch, the tracking satellite, S.I.D. I’m not the biggest fan of S.I.D.’s design and all the fine details of the original model could have led to this one being a needlessly pricey LEGO® build. I therefore set myself the unique challenge of trying to make my S.I.D. model as tiny and cute as possible, while retaining the key details.
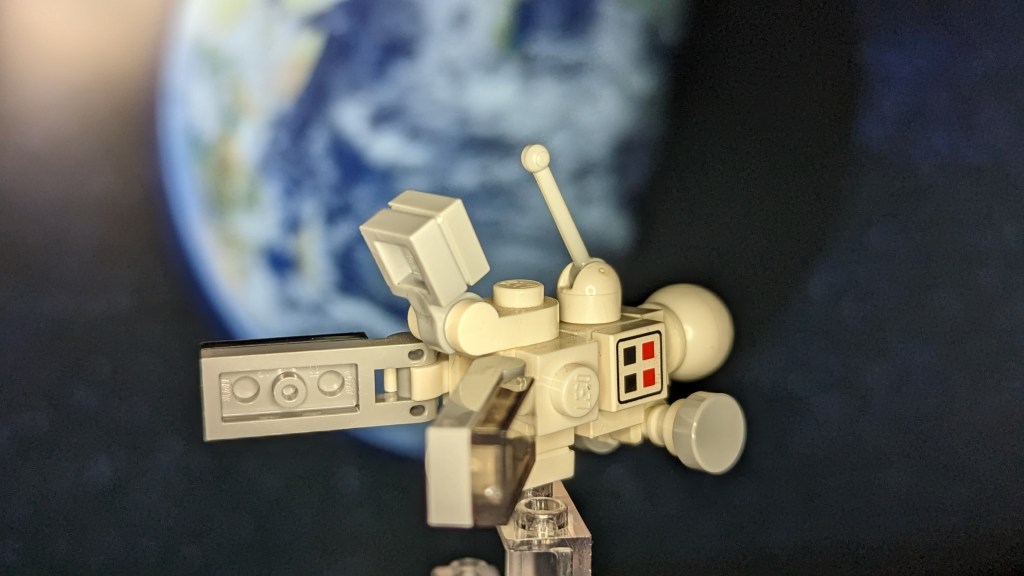
The whole build is based around two 1 x 1 modified bricks with studs on 4 sides. From there I just started attaching clips and brackets and anything else I needed to get S.I.D.’s various antenna, dishes, and panels sticking out in the right directions. Printed tiles came in very useful for filling in some of the finer details. The highlight of the build was definitely discovering LEGO®’s gorgeous solar panel prints on 1 x 2 trans-black tiles. Neatly finished off with a technic ball joint piece for S.I.D.’s signature spherical face, I’m delighted to say my micro version of SHADO’s dependable satellite is a lovely addition to my collection. A larger build of the same vehicle would have been frustrating and complicated, but my tiny interpretation came together easily and is still instantly recognisable. Sometimes, the simplest solutions are the best ones.
SHADO Mobiles

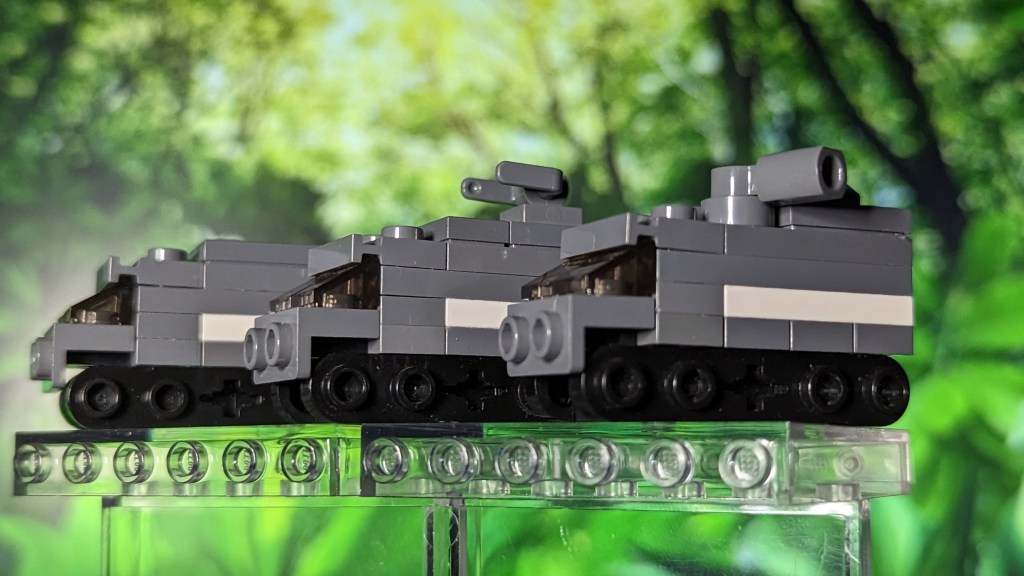

A fan-favourite, the mobiles didn’t present too much of a LEGO® design challenge seeing as they’re essentially brick-shaped anyway. In this instance, I was keen to capture some of the variations on the vehicle that are shown hunting crashed alien ships throughout the series. The base model started with 1 x 1 cheese slope pieces in trans-black for the windscreen. For the trademark caterpillar tracks, I utilised two black 1 x 5 technic plates with rounded ends to offer the illusion of wheels without the complexities of adding the real thing at such a small scale.
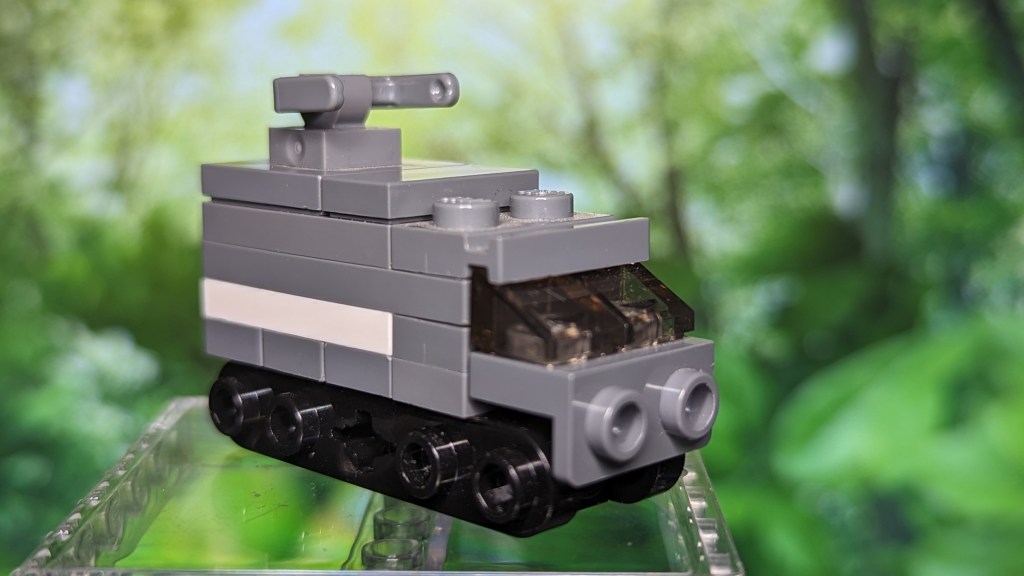

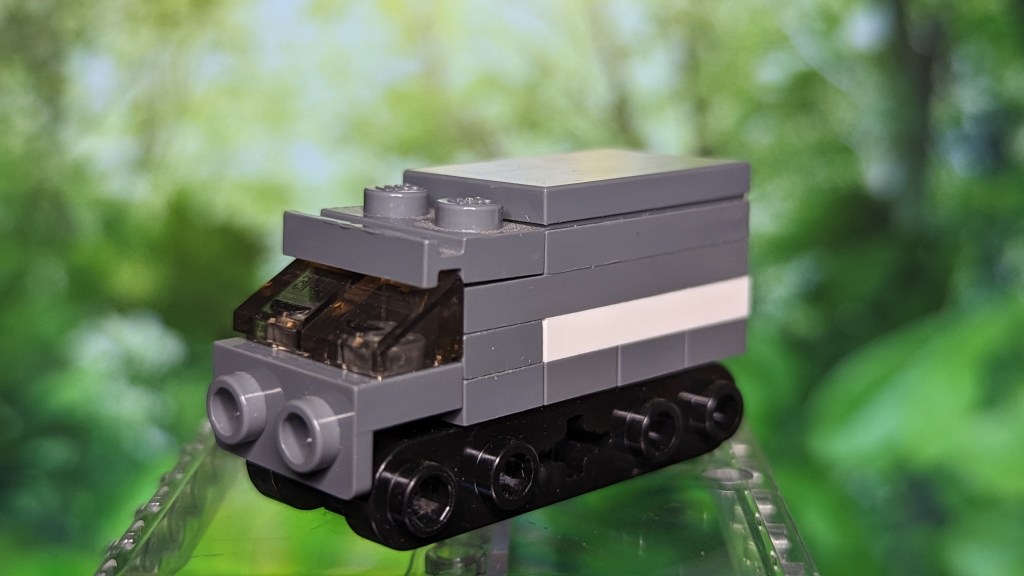
Once the foundational build was ready in dark-bluish grey, the three variants of the vehicle came together by simply adding or removing tiny pieces to create distinguishing details. The SHADO Control vehicle needed a small radar dish on top, which was achieved using a minifigure-scaled bucket handle clipped in place. The armed SHADO Mobile uses another 1 x 1 cheese slope on the roof to represent the bombing canon, while a bar holder with clip attached to a round 1 x 1 tile with a bar and pin holder served as the machine gun turret. The unarmed variant was simply finished with a 2 x 3 tile for the roof. Et voila, three vehicles for the price of one! After all, having only one SHADO Mobile on patrol just wouldn’t be proper.
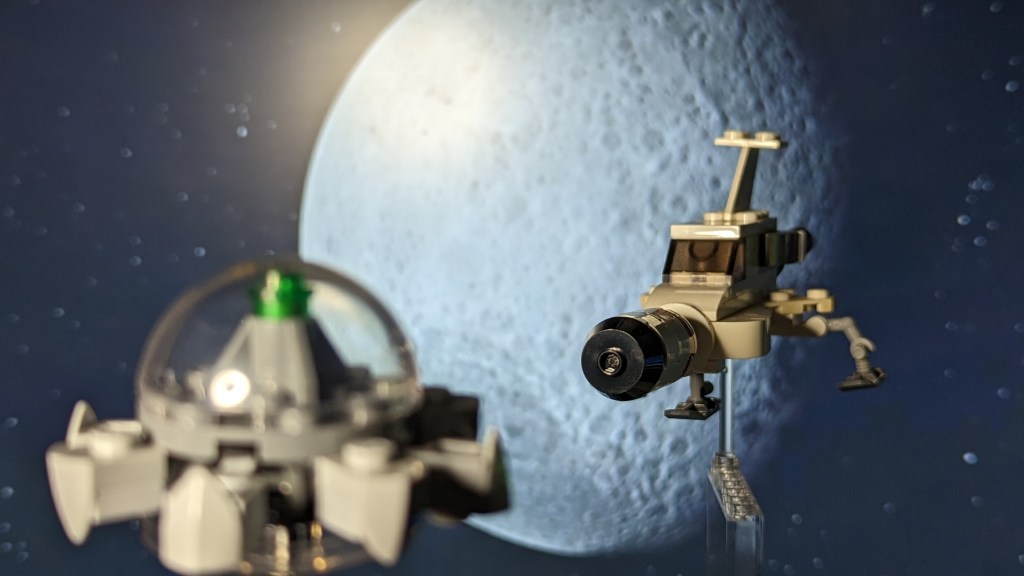
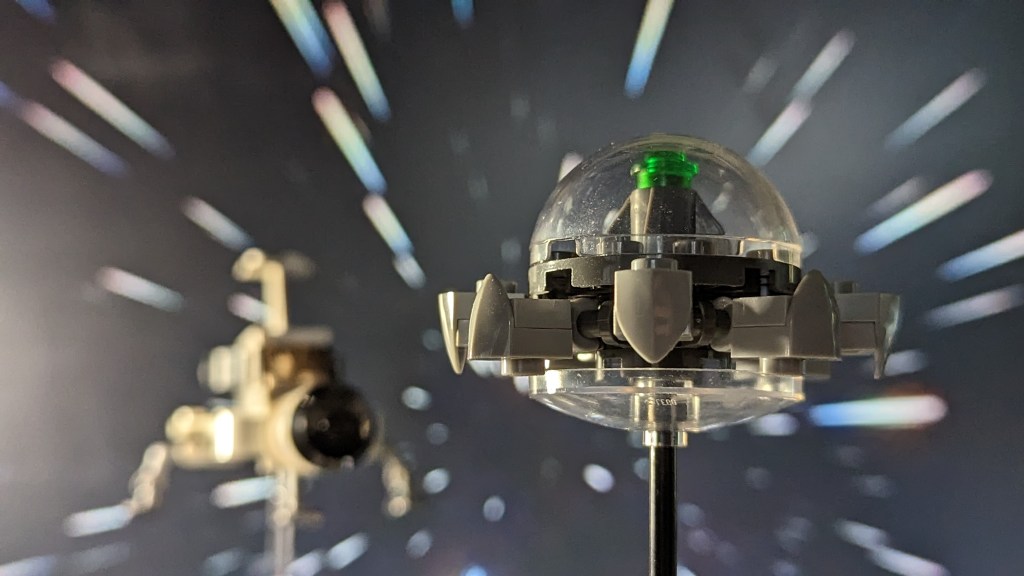
The Alien Ship
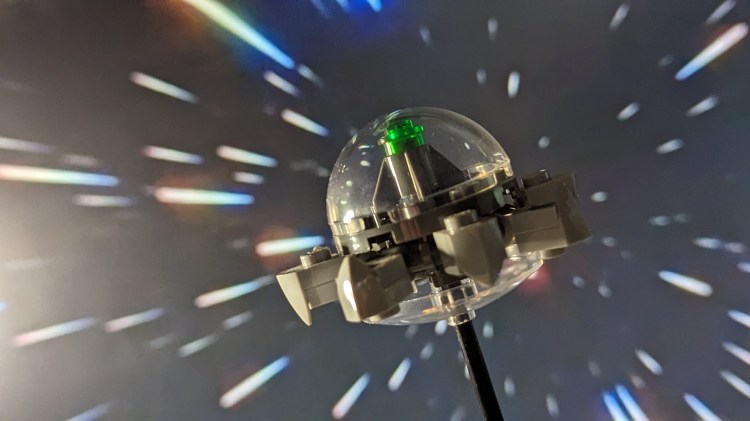
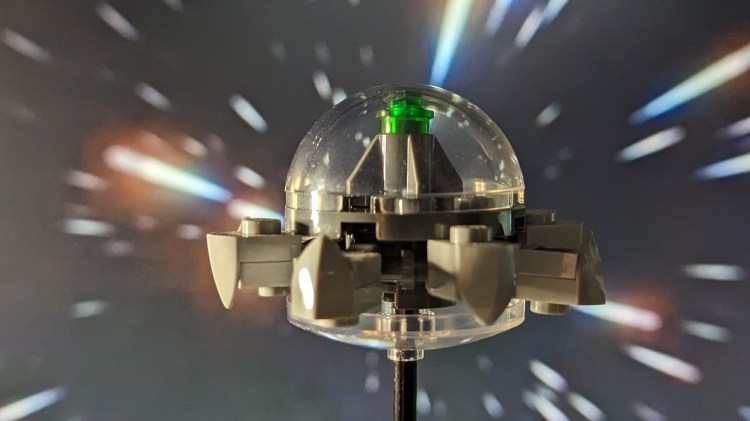
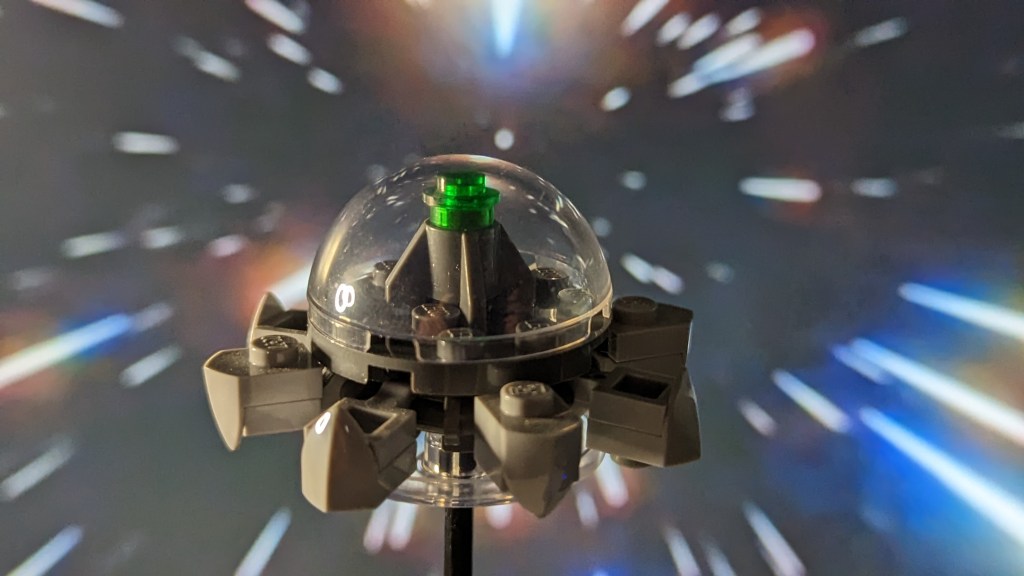
No UFO collection would be complete without the titular enemy craft from the series. The aliens’ spinning vessel of doom is a unique design which would have driven me to madness had I been building it at full minifigure scale. For one thing, I couldn’t tell you what size the darn thing is supposed to be anyway. Instead, I simply decided to base my micro model around a 4 x 4 trans-clear dome piece which seemed to be perfect for the job. I had to reduce the number of paddles surrounding the craft down to just eight so that they could be large enough to look the part, and small enough to fit around the circumference of the UFO. Fortunately, LEGO®’s handy 2 x 2 modified plate with an octagonal bar frame was made for the task of clipping all these tiny paddles securely to the ship. With the final details such as a single trans-dark-green stud inside the dome, and the UFO was ready for action!
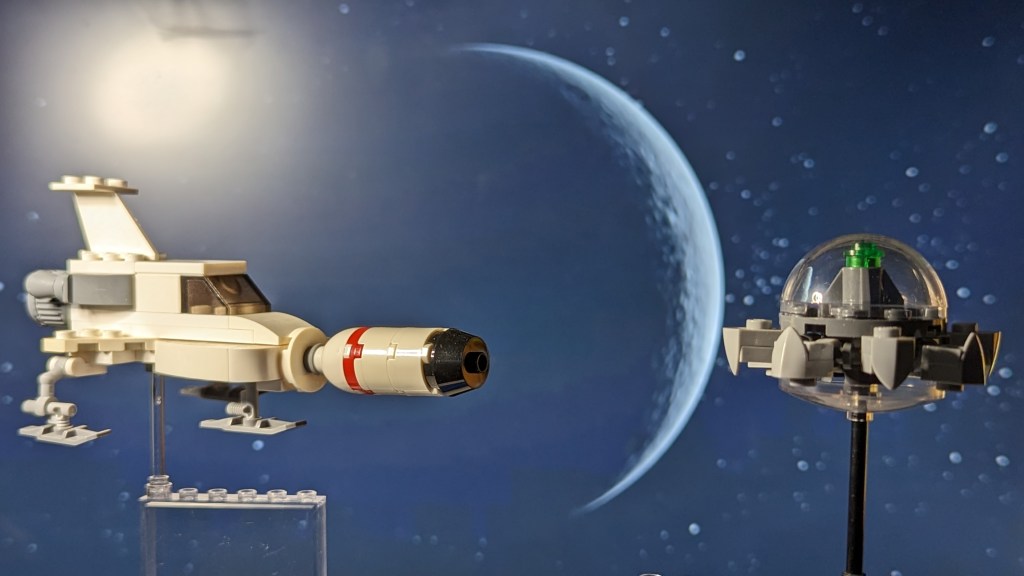
SHADO Moonbase Interceptor

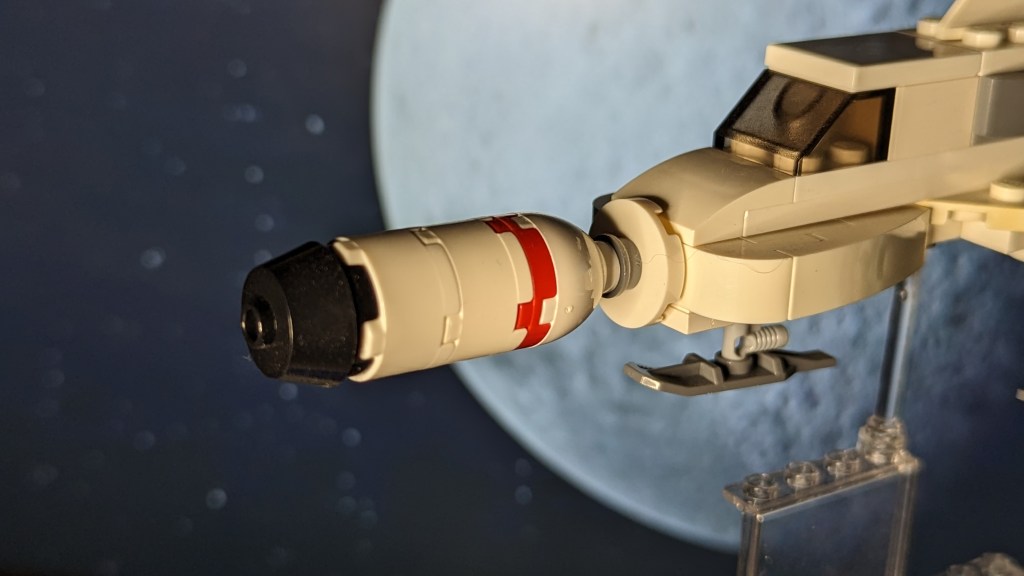
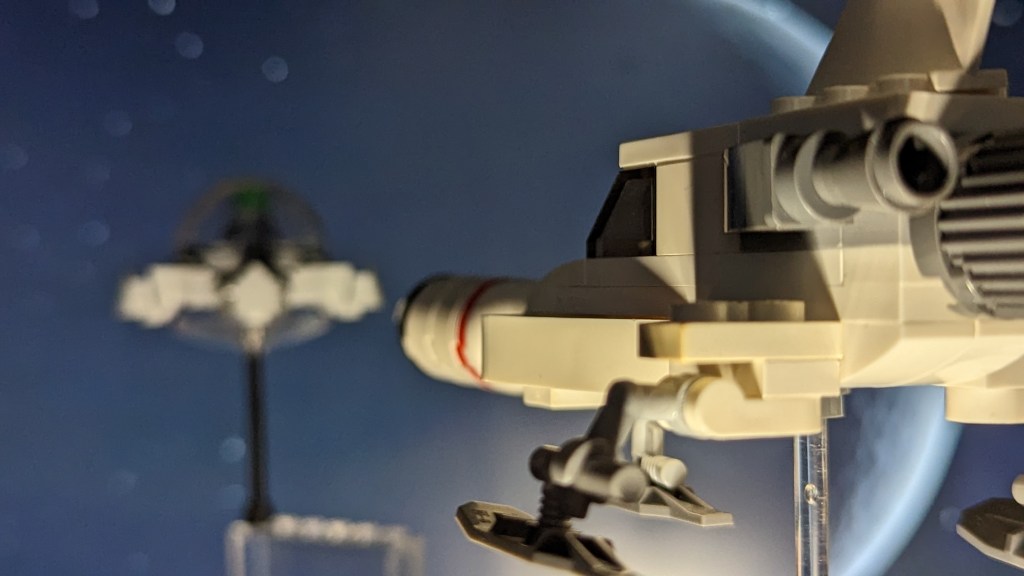
One of the most LEGO®-ified vehicles in the Anderson catalogue outside of Thunderbirds and Space: 1999, the Moonbase Interceptor has been built beautifully at minifigure scale by many talented MOC designers around the world. At micro scale, I can tell you that this craft is just as fun to put together. The distinctive, rounded shape was achieved with SNOT techniques and some carefully chosen curved slopes.
I had a hard time landing on the exact size of missile I wanted to fix to the front. One of the disadvantages of working at a smaller scale is that sometimes it’s an agonising choice between making something one stud wide, or two studs wide, when what you want is for something to be one and a half studs wide. In certain cases that’s achievable with special techniques, and sometimes you just need to accept that the dimensions of the finished build aren’t going to be perfect. A missile assembled using 1 x 1 round bricks would have been too small, but the 2 x 2 round bricks intially seemed far too big to be in-scale with the rest of the craft. In the end, I settled on the larger option, arguing that the big rocket on the front was one of the interceptor’s most distinctive and memorable details, and going bigger with it was ultimately going to be more satisfying (oo-er).
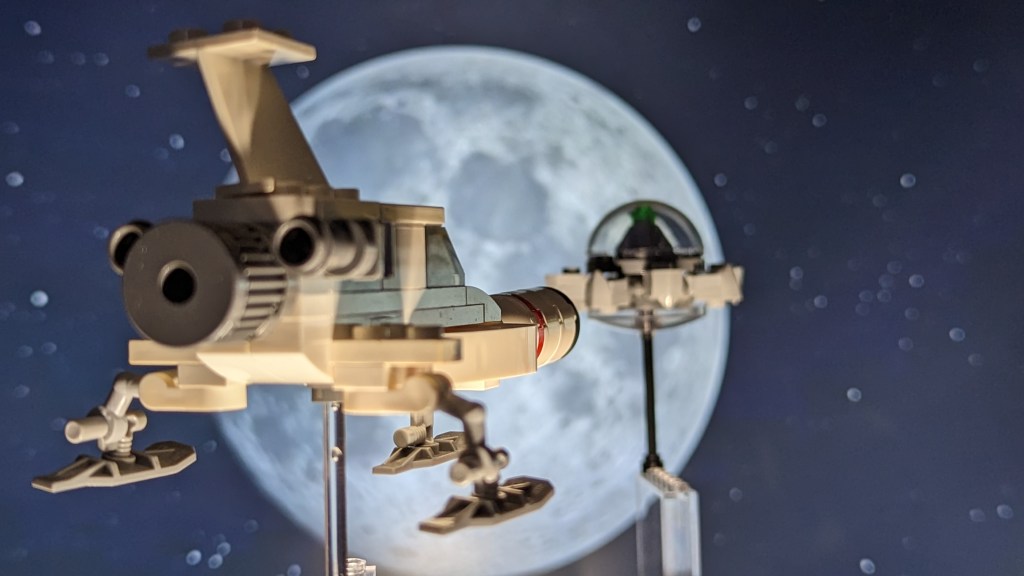
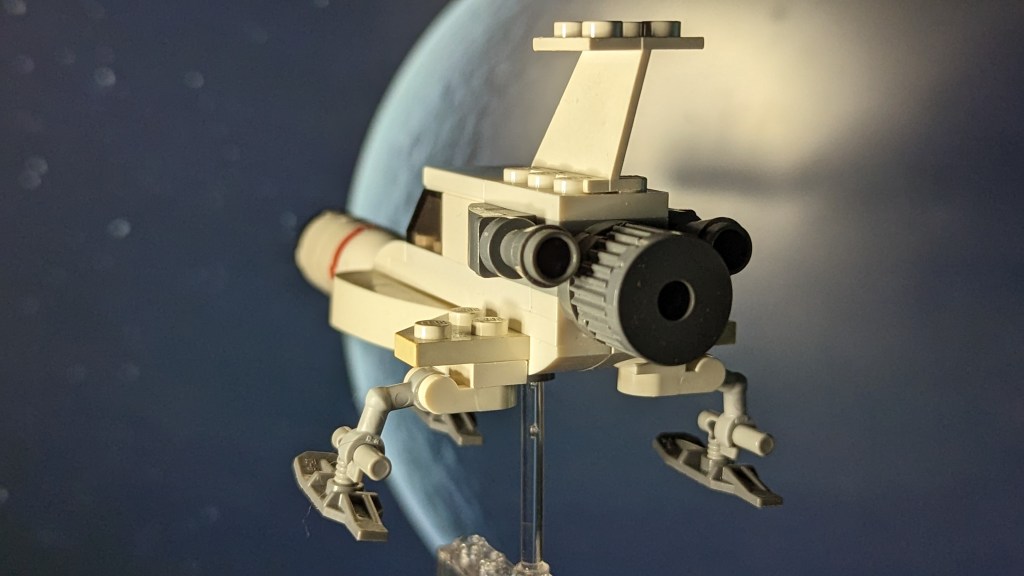
The rear tail fin of the interceptor is awkward in that it’s just a hollow frame on the real studio model. My options were limited, working at this scale, and I tried a number of options to make the triangular frame using tiny bars and clips and tiles. Everything I did looked too chunky and out of place. In the end, I decided to ditch the hollow tail fin entirely and settled for a standard LEGO® fin which required no adaptation. Although not accurate to the original ship, it makes for a much better looking, and also far sturdier, LEGO® model.
A joyful moment occured when I realised I could use real LEGO® minifigure skis to serve as the landing skids of the interceptor. Held in place by bars and clips, the skids on the wing tips are a tad flexible and can barely hold up the rest of the model, but the central skid under the cockpit more than makes up for it by taking most of the strain. The alternative would have been creating much chunkier landing legs which would have looked out of place and ugly.


Overall, I’m extremely happy with these little LEGO® UFO vehicles. So much of my focus has been on vehicles from the Supermarionation shows, so it was fun to try out some new Anderson territory. I would love to come up with more MOCs from UFO such as the Lunar Module and Carrier, or a Moon Mobile, or even a whole Moonbase. But I’m also keen to keep exploring other Anderson series to find new and unusual craft that haven’t been built with LEGO® before.
Stay tuned to Security Hazard for more insights into my LEGO® builds as well as news, reviews, and more from the worlds of Gerry Anderson!
Next Time


References
UFO © ITV PLC/ ITC Entertainment Ltd.
LEGO® is a trademark of the LEGO Group of companies which does not sponsor, authorize or endorse this site.
More from Security Hazard

LEGO Zero-X MOC (Thunderbirds Are Go)
There’s something about Zero-X which lends itself to the medium of LEGO. The blocky and modular nature of the design make it a match made…
Keep reading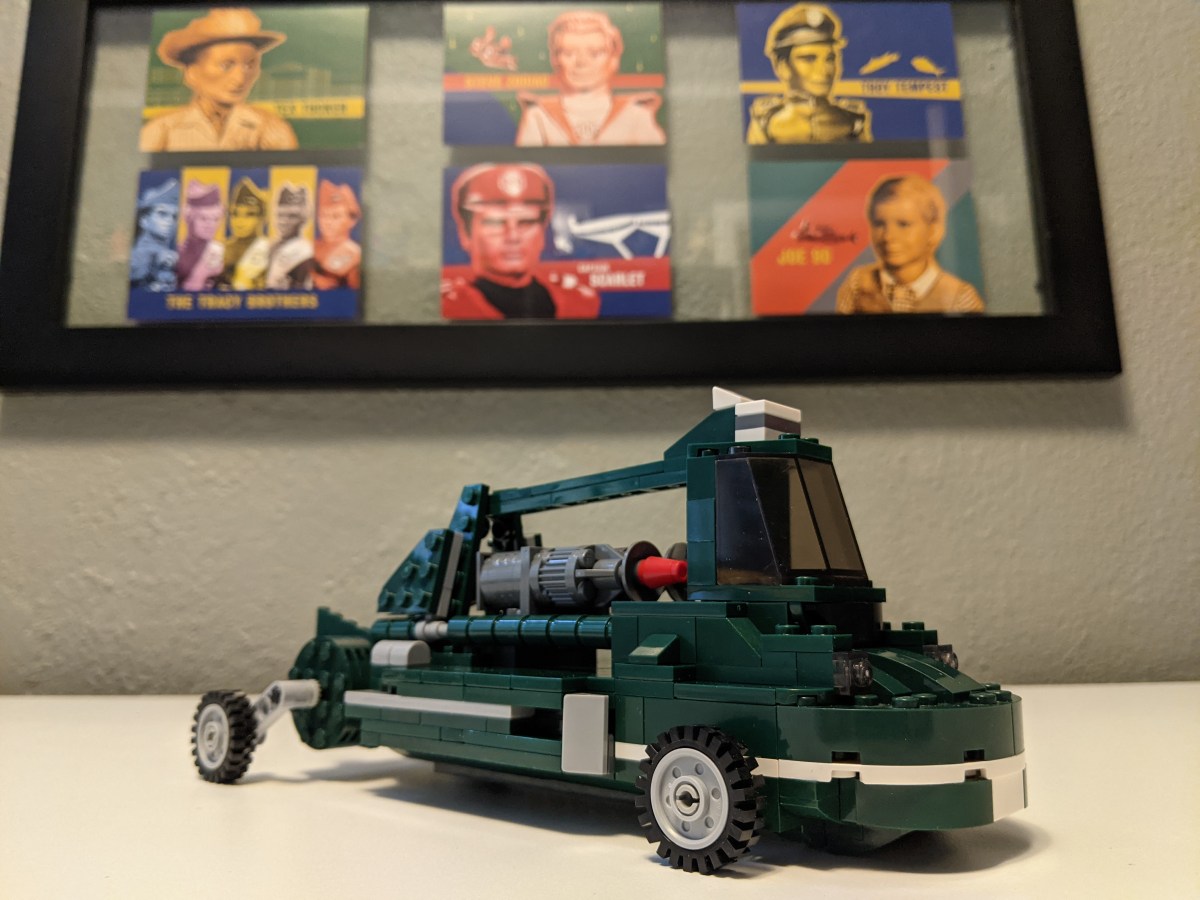
LEGO Mac’s Jet Air Car (Joe 90)
Recently looking at my collection of Anderson LEGO vehicles, I realised that I now had a model of something from every Supermarionation series except Four…
Keep reading
LEGO Gabriel (The Secret Service)
A vintage 1917 Model T Ford, Gabriel is the odd one out among the Supermarionation star vehicles. Then again, The Secret Service as a series…
Keep reading
Great models! I’ve just released a bigger UFO Mobile MOC:
https://rebrickable.com/mocs/MOC-199446/divinglog/shado-ufo-mobile/
And also an Eagle MOC some time ago:
https://rebrickable.com/mocs/MOC-25026/divinglog/space-1999-eagle
LikeLike